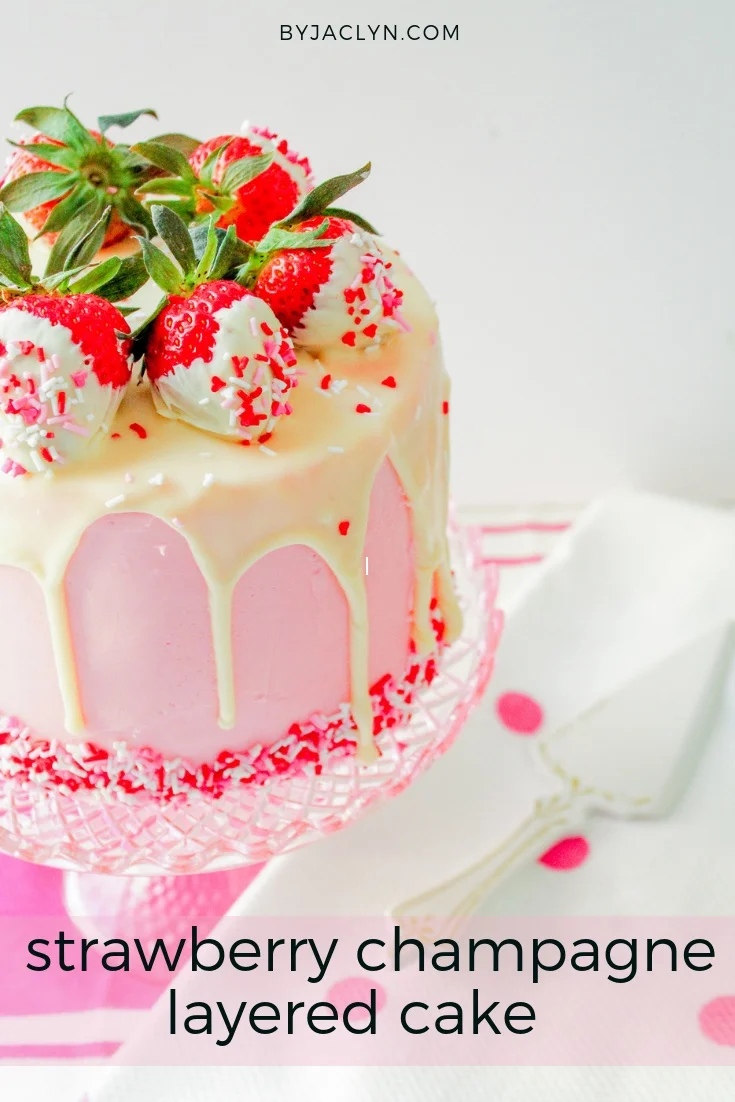
This bubbly, bright and beautiful cake is sure to delight any (champagne) lover. This layered cake highlights the classic pairing of strawberries and champagne.
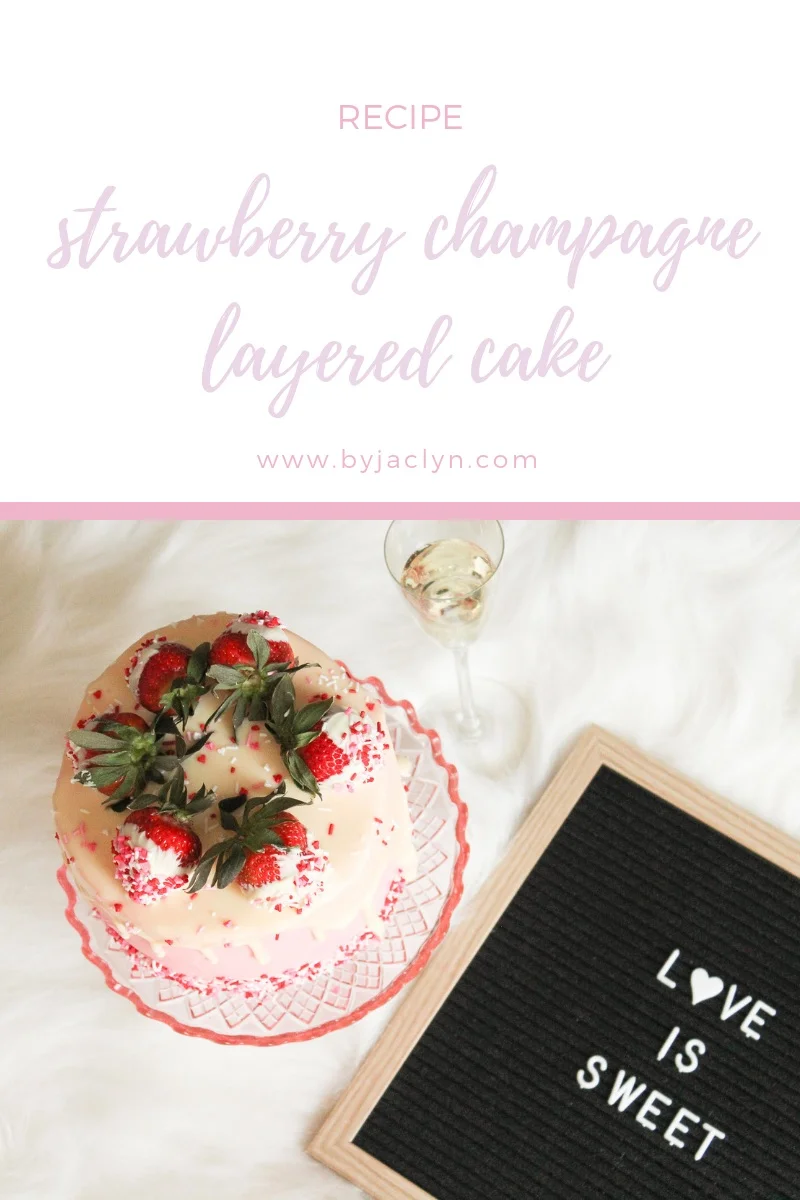
This cake is so me! I love all things pink and who can’t resist a glass of bubbly?? I love everything from the pink frosting to the chocolate covered strawberries and sprinkle medley. This cake is perfect for Valentine’s Day! It would also make for the perfect centrepiece for a Galentine’s Day Brunch. The fresh strawberries paired with the effervescent Champagne make for one delicious cake.
The champagne and strawberries pair so well together… it’s no wonder they are a classic pairing! While this cake has a few different components - they all come together fairly quick! If you would like to make a few things in advanced the cake layers can be made in advanced and frozen. Just fill and frost as usual from frozen. The layers will thaw out beautifully. The strawberry champagne filling can also be made a day in advanced and kept in an airtight container in the fridge.
The champagne syrup really helps to infuse the cake with champagne flavour. It adds the perfect amount of sweetness and flavour to the cakes, while helping to keep the cake layers nice and moist. It is best to infuse this into the cake while the syrup is still hot. The filling is bright and fresh. The strawberry really shines through. The cake itself is moist and has a wonderful crumb. It shockingly (for me anyways) doesn’t have any butter but is an oil based cake. I love the flavour of it paired with the strawberry champagne filling.
I have a love for tall cakes and this one does not disappoint. It has great height which is perfect for a chocolate ganache drip. I like to use a spoon to add the drips where I want them down the sides of the cake and then go back and fill in the top using an off set spatula. I used a small (375ml) bottle of champagne for this cake. It was the perfect size. I had enough bubbly for the syrup and the filling (and a glass to sip).

Strawberry Champagne Cake
Makes: one 6 inch cake
Ingredients
For the Cake
3 ½ c flour
½ tsp salt
1 tbsp baking powder
4 eggs
2 c sugar
1 c canola oil
1 c milk
1 tsp vanilla
Champagne Syrup
½ c champagne
2 tbsp sugar
Strawberry Champagne Filling
1 ½ c strawberries, diced
½ c champagne
½ c water
½ c sugar
1 tbsp cornstarch
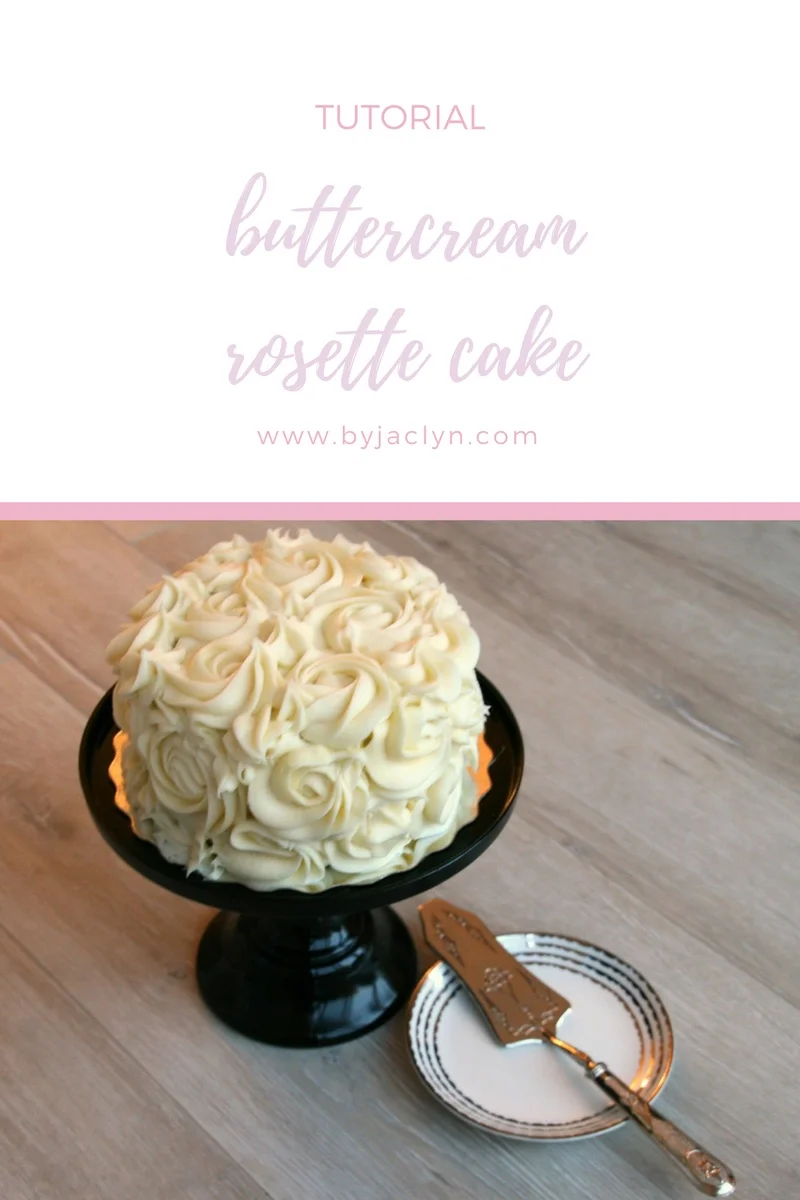
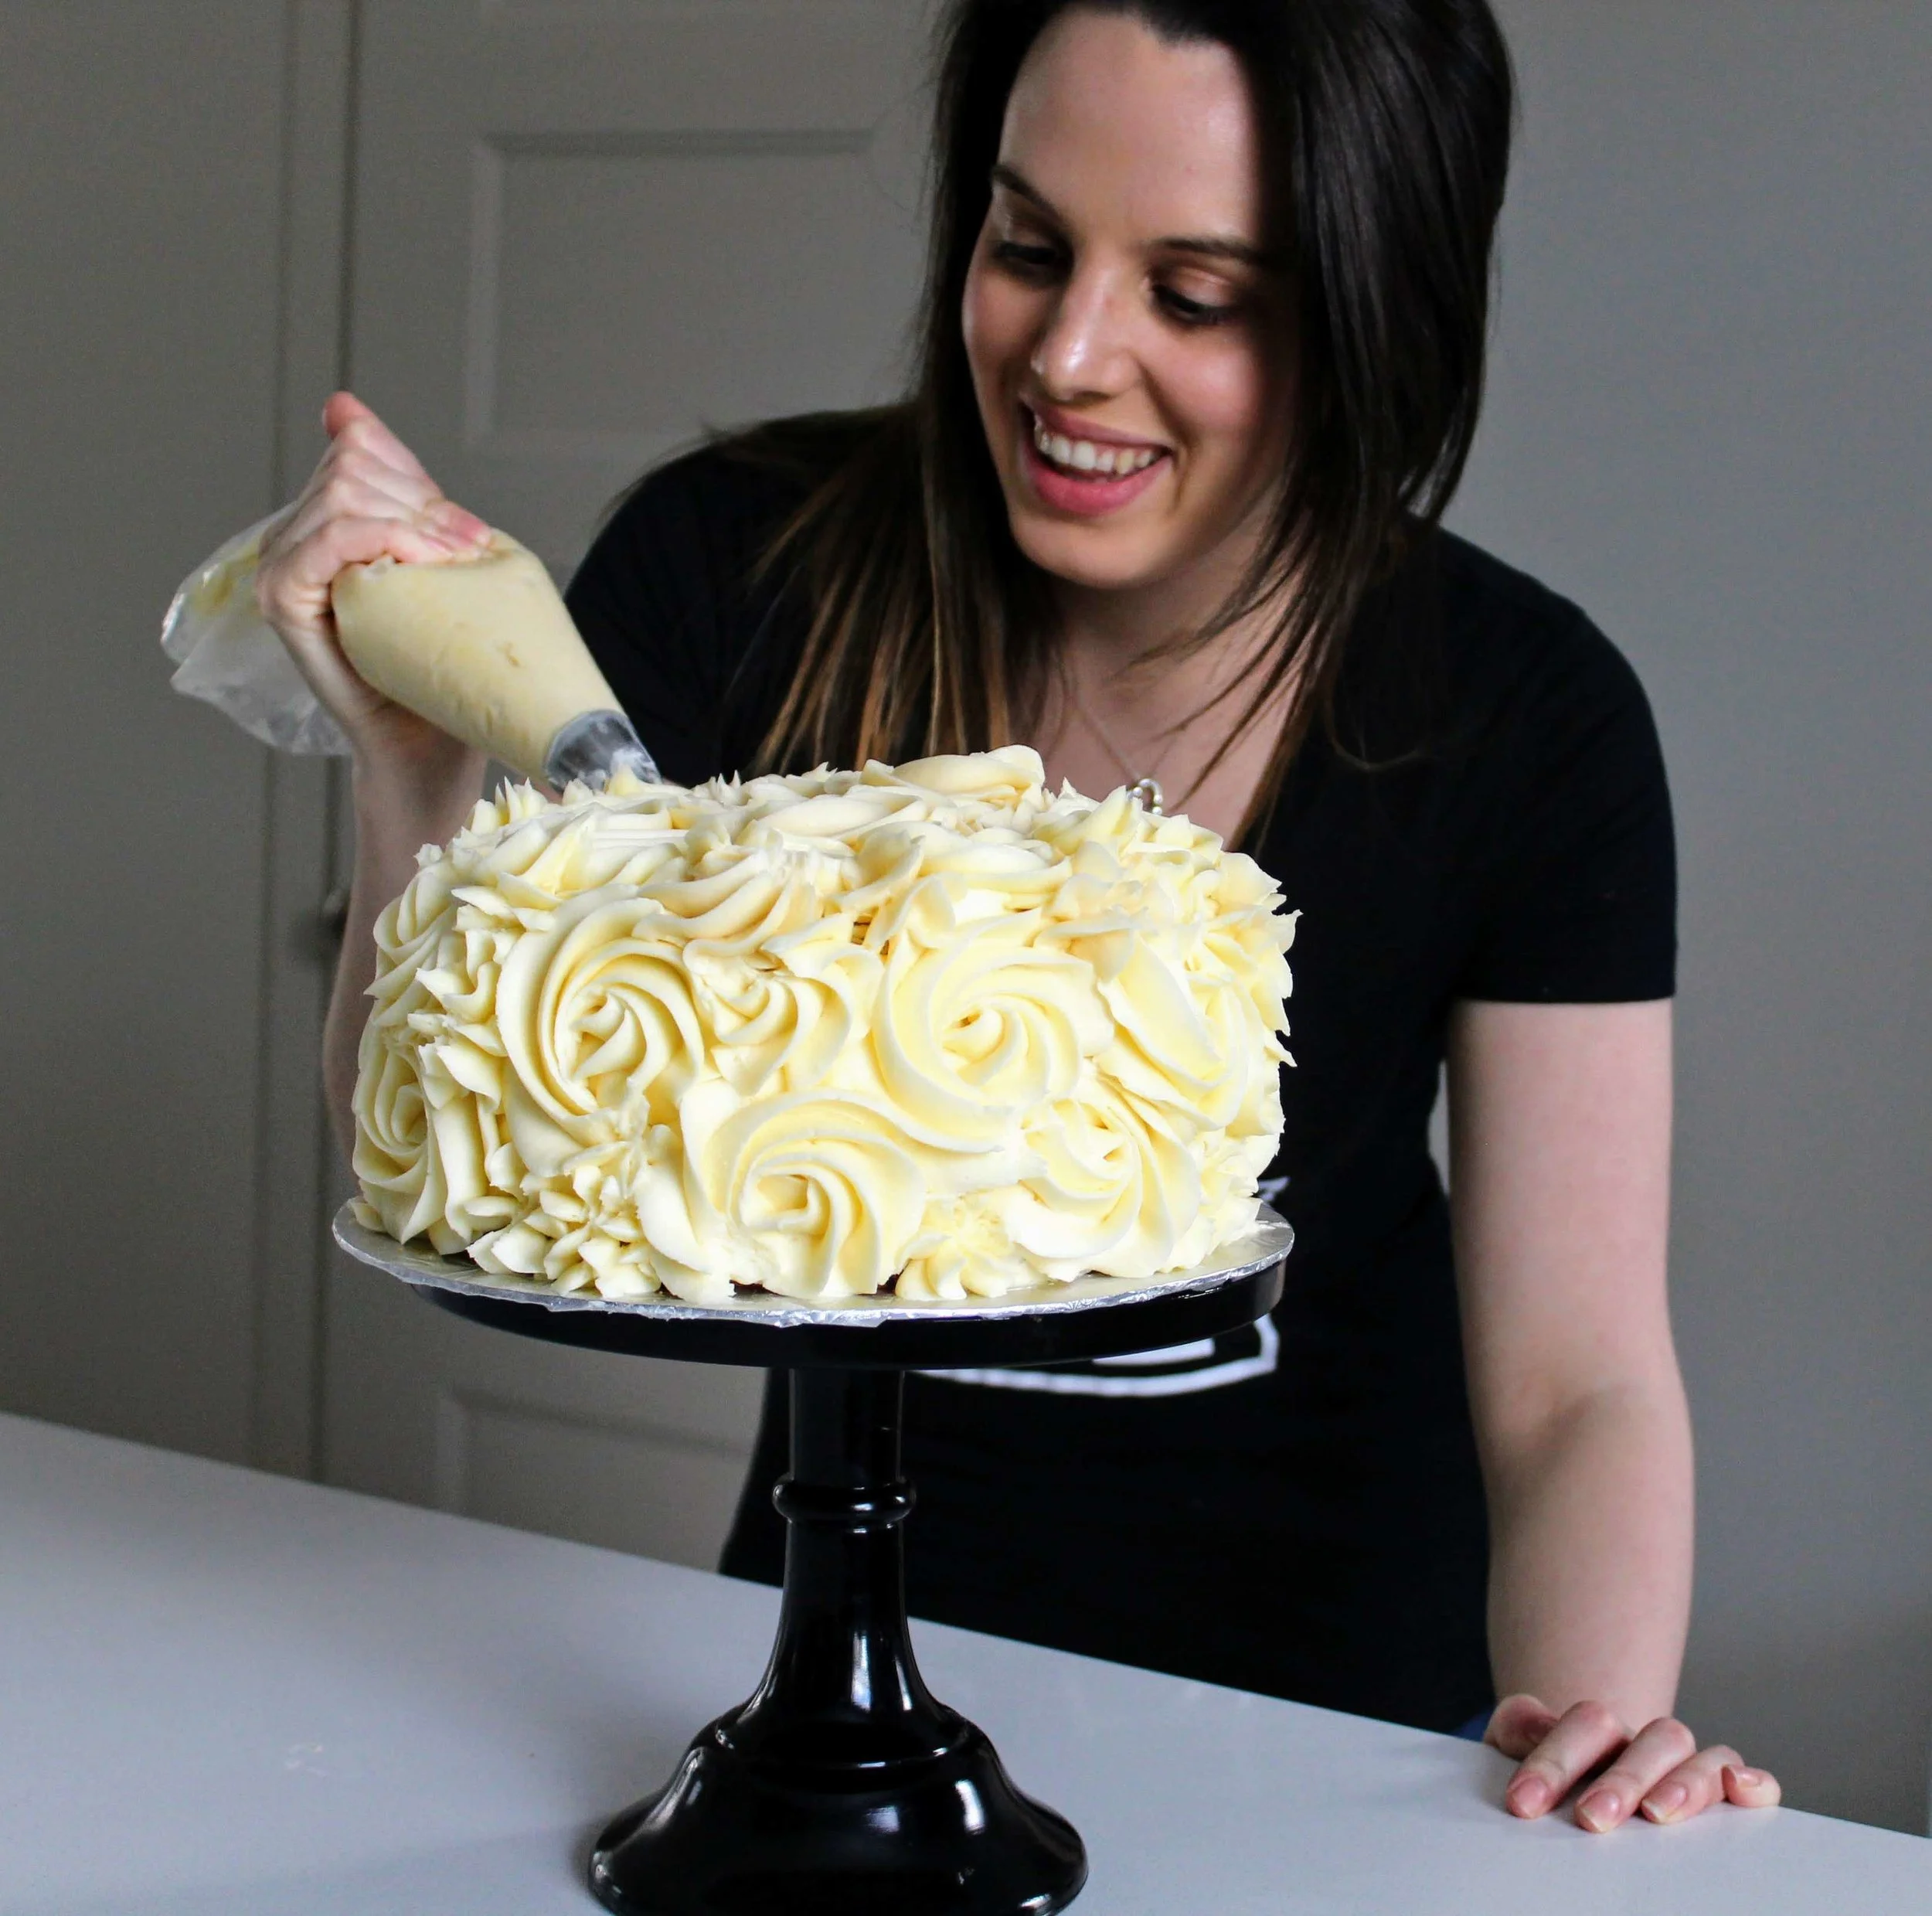
Vanilla Buttercream
1 cup unsalted butter, at room temperature
3 cups icing sugar
2 teaspoons clear vanilla extract
1-3 tbsp heavy cream (optional)
Red Gel Food Colouring
Chocolate Covered Strawberries
4-6 Strawberries
½ c white chocolate chips, melted
sprinkles (optional)
White Chocolate Glaze
½ c white chocolate chips
¼ c heavy cream
Directions
For the cake: Pre-heat oven to 350F. Grease and flour three 6 inch cake pans, set aside. In a medium bowl, whisk together flour, salt and baking powder. Set aside.
In a bowl of a stand mixer, fitted with a paddle attachment, over medium speed beat together eggs and sugar. The mixture should lighten in colour and increase in volume. Continue mixing until very light in colour and almost tripled in volume (about 5 minutes). With the mixer on low-medium speed, continuously add the oil, mix until just combined.
Alternate adding the flour mixture and the milk and vanilla, starting and ending with the flour mixture. Mix until just combined, do not over mix. Evenly pour batter between the three prepared pans. Bake for 45-55 minutes or until a toothpick inserted into the centre comes out clean. Allow cakes to cool in the pan for 5-10 minutes before inverting onto a cooling rack to cool completely.
For the Champagne Syrup: In a small saucepan, over medium heat combine champagne and sugar. Stir until sugar dissolves. Bring to a boil and let reduce by half.
For the Strawberry Champagne Filling: In a small saucepan, over medium heat, combine strawberries, champagne, water and sugar. Stir occasionally. Bring to a boil and let it simmer for 5-10 minutes or until the liquid has reduced by half. Using an immersion blender, puree mixture until smooth. Bring mixture back to a boil and whisk in corn starch. Allow filling to cool completely before use.
For the Buttercream: In a stand mixer fitted with a paddle attachment beat butter on medium-high speed until light and fluffy. Beat in icing sugar, one cup at a time, until well combined. Beat in vanilla & gel food colouring. Optional - beat in heavy cream 1 tbsp at a time until desired consistency is reached.
For the Chocolate Covered Strawberries: Line a baking sheet with parchment paper. Dip strawberries in white chocolate and place on parchment paper. Top with sprinkles if using. Let chocolate set completely before using.
For the Chocolate Ganache: Heat heavy cream until almost boiling (about 30 seconds to a minute in the microwave). Pour over chocolate chips and stir until smooth.
To Assemble: Fill a piping bag fitted with a round tip with buttercream. Place one layer of cake on your cake board or serving dish. Brush cake layer with hot champagne syrup. Pipe a ring or dam of frosting around cake layer. Fill with strawberry champagne filling. Top with cake layer and continue to fill and stack cake. Once the last cake layer is placed, chill cake in fridge for 10-15 minutes to allow cake to set. Apply a crumb coat of frosting and allow cake to chill for another 10-15 minutes. Frost cake as desired. Top cake with white chocolate ganache and chocolate covered strawberries.