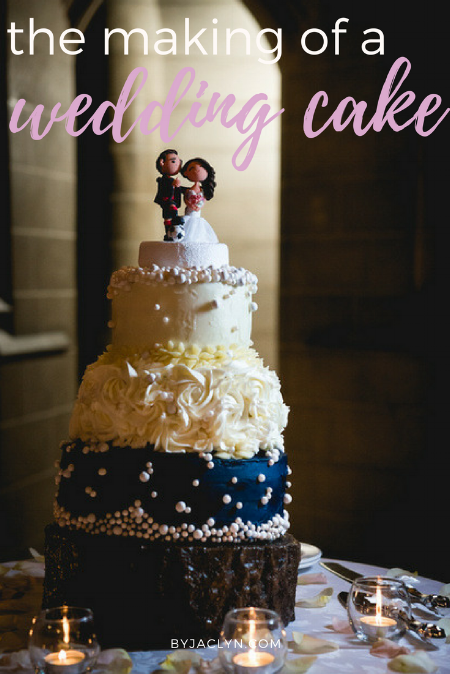
My cousin got married in November. When she got engaged she asked me to make her wedding cake! I was a bit nervous as I have never made such a large (and important) cake before. I immediately started thinking of different techniques, elements and designs that I wanted to incorporate into the cake. I obviously began pinning away - you can check out my inspiration board here. I knew I wanted to keep the design simple and elegant. After lots of back and forth over the design of the cake we finally settled on a three tiered caked with a buttercream design.
The Design Process
The colours she choose for her winter wedding were navy, ivory and blush - which is one of my favourite colour combinations! Originally, since it was a winter wedding I was leaning towards evergreen and cranberries to embellish a simple buttercream cake but after talking with the bride we decided to move in a less Christmas-y direction and more towards a winter wonderland theme.
We went back and forth on the design of the cake. It was important to me that I felt comfortable with all the techniques going into the cake. I didn't want to stress myself out by promising something I wasn't confident that I could deliver on. Luckily, I had lots of inspiration to draw upon.
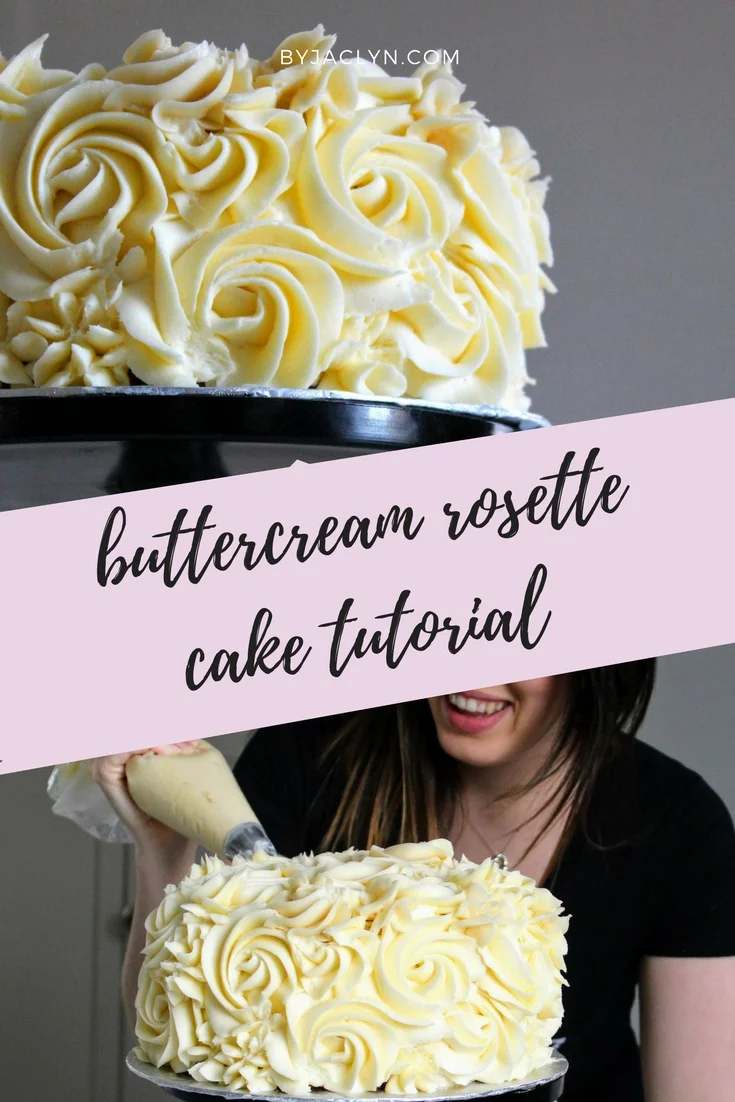
I knew I wanted for the cake to have some texture to add some visual interest and break up the layers. The simple rosette buttercream technique is a favourite of mine as it produces such a stunning result. After seeing a photo of this cake I made earlier in the year, both the bride and groom agreed they wanted to incorporate it into their cake.
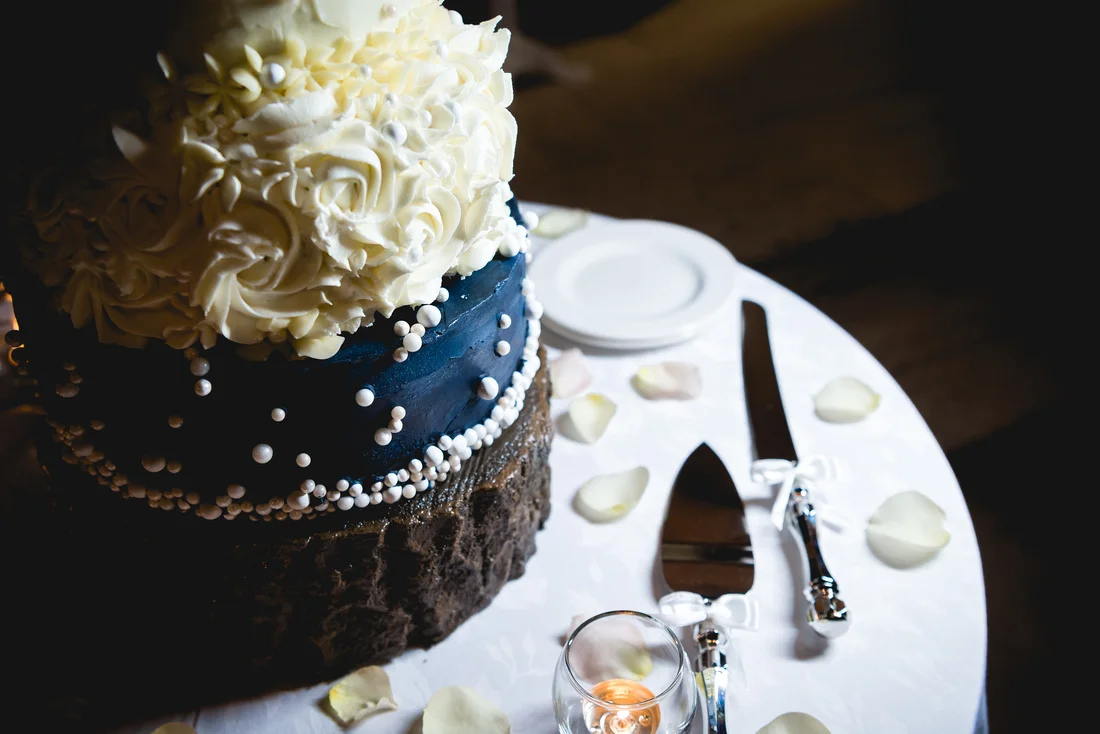
To add some glamour to the cake we decided to use edible pearls in various sizes and shades. I loved how they caught the light and added more texture to the cake. They also helped to tie the tiers together and create a more cohesive design. I loved how the blush and ivory pearls popped on the navy buttercream. It created a really beautiful effect.

Photo by: Andrew Downs Photography
Cake Making & Decorating Timeline
Deciding on the timeline of making and decorating the cakes was probably one of more stressful aspects of the entire process - the most stressful being actually delivering the cake but more on that later. I knew I wanted to leave enough time that I wouldn't feel rushed while making the cake but I also wanted to ensure that the cake was as fresh as possible for the day.
I choose to make the cake layers ahead of time and freeze them. This is something that I do often. I prefer levelling a cold cake. Freezing the cake does not effect the freshness, texture or moistness of the cakes at all! Freezing the cake layers means that you have more time closer to the wedding to focus on filling, frosting and decorating your cakes. Plus your cakes will already be cooled and ready to go when you want to start decorating!
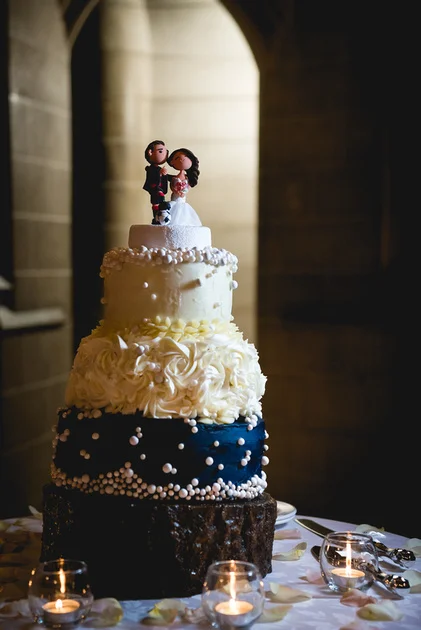
Photo by: Andrew Downs Photography
Delivery & Logistics
This was the part that I was most worried about in the whole process. It would be heart breaking to make a beautiful cake only to have it ruined before getting to the venue! I didn't want all my hard work to go to waste. I went back on forth on how best to deliver the cake. It would be traveling by car for over an hour from where I was making it to the wedding venue. I decided that the least terrifying and most logical way to deliver the cake was as three separate layers and to stack the cake once I got to the venue. I have successfully delivered individual cakes before so why not go with what I know. This worked really well. The cakes were doweled and placed on cake boards when I was making them so they were all set to be stacked at the venue. I created a kit of everything I thought I would need (or might need) at the venue.
When transporting the cakes I used individual cake boxes for them about 1-2 inches wider then the actual cakes. I used small squares of shelf (grip) liner under the cakes between the cake board and the box to keep the cake from sliding around in the box. I also cut larger square of the shelf liner to place under the boxes in the trunk of my car to keep the boxes from sliding around. This worked really well. The cakes were nice and secure and there was no damage!
I was able to stack the cakes on site and add any last minute touches to the final cake. A few of the pearls fell off during transportation - but that was an easy fix! I would definitely recommend bringing extra buttercream, pipping bags, spatulas and extras of any delicate decorations. Once I added the cake topper - the cake was complete and ready for its debue!

Overall I am so happy with how the cake turned out! It was amazing being a part of my cousin's wedding day is such a special and unique way. I am so happy that I pushed myself out of my comfort zone and made her wedding cake! I learned so much along the way about making large tiered cakes and I enjoyed myself in the process. I loved seeing everyone's reaction to the cake - especially the bride and groom!